How to Make a Flanged Piping Edge for a Cushion: A Step-by-Step Guide
Nachricht

How to Make a Flanged Piping Edge for a Cushion: A Step-by-Step Guide

If you're looking to add a professional, tailored touch to your cushions, learning how to make a flanged piping edge is a great skill to master. Flanged piping adds a sophisticated, polished look to any cushion, making it feel more luxurious and carefully crafted. Whether you're working with upholstery fabrics, cotton, linen, or velvet, the piping gives your cushion an elegant finish that complements both modern and traditional interiors.

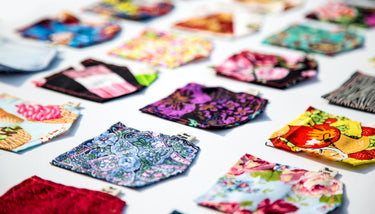
The Songbird Fabric is perfect for cushion making.

In this step-by-step guide, we’ll walk you through how to create a flanged piping edge for a cushion using simple tools and techniques. Let’s dive in!

What You’ll Need:

Before you get started, gather the following materials:

  • Fabric: Enough to cover both the cushion front and back.
  • Piping Cord: This is the central part of your piping, which adds structure and shape. You can buy pre-made piping or create your own with cord and fabric.
  • Fabric for Piping: You’ll need a contrasting or complementary fabric for the piping. A cotton, linen, or even a velvet fabric works well here.
  • Cushion Pad: Choose the type of filling you want for your cushion, such as polyester or feather.
  • Thread: Pick a thread colour that blends well with your fabrics.
  • Sewing Machine: A machine with a zipper foot will speed up the process, but you can also sew by hand if preferred.
  • Pins and Scissors: For precise cutting and pinning.
  • Iron: For pressing your seams and piping.

Step 1: Cut Your Fabric

First, you need to cut your fabric pieces to the correct size. You’ll need:

  • Front and back cushion pieces: These should be the size of the cushion you want to make, plus seam allowances (usually around 1 inch on each side).
  • Piping strips: Cut strips of fabric to wrap around the piping cord. Each strip should be approx. 2 inches wide and cut on the bias of the fabric.   Calculate the length that you will require for the piping to go all around the size of the cushion and allow extra for turning the corners and a bit extra at the end.  Sew all your strips together to create a continuous bias strip

Step 2: Make the Piping

  • Wrap the fabric around the piping cord: Start by laying your piping cord along one edge of the fabric strip, then fold the fabric over the cord so that both edges meet in the middle. Pin the fabric in place.
  • Sew the piping: Using a zipper foot on your sewing machine, sew along the edge of the piping cord, making sure to keep the stitching close to the cord. This step is crucial, as it creates the structural element that will define your cushion’s edge. This will create your piping with a flanged edge.

Step 3: Attach the Flange

  • Attach the flange to the cushion: Lay one of your cushion pieces (the front or back) flat and pin the flange fabric along the edge of the right side of the cushion piece. You want to make sure the raw edges of the flange are aligned with the edges of the cushion fabric.
  •            Positioning the cord around corners: Because you will have made your piping with bias strips, bending it to go around the corners will be relatively easy; however, it will still need a little help.
  • Snip into the seam allowance of the piping in a few places to allow the piping to curve more easily. Take care not to snip past the stitching line on the piping. If you curve tightly around the corner, the result on your cushion corner will be more rounded. If you push the piping seam allowance a little more up into the corner of the seam allowance of the cushion front the resulting corner will be ‘squarer.
  • Sew the flange in place: Sew along the edge, attaching the flange to the cushion fabric. You’ll be left with a small seam along the edge of the fabric.

  • Press the flange: Gently press the flange with an iron to create a crisp, defined edge. This step helps give the cushion a more professional, finished appearance.

Step 4: Assemble the Cushion

  • You can now assemble the cushion with right sides together sewing as close to the piping cord using your zipper foot to give a nice neat finish using whatever opening you have decided on i.e. zip opening or an envelope backed cushion.

Step 5: Final Touches

  • Finally, give your cushion a good press with an iron to smooth out any wrinkles and make the piping and flange edges stand out. Make sure all seams are neat, and the piping is securely attached. Your cushion is now ready to be displayed!
Why Choose a Flanged Piping Edge?

Flanged piping edges aren’t just visually appealing—they also provide a range of benefits for your cushions:

  1. Adds Structure: The piping creates a defined edge that adds structure to your cushion, making it feel more polished and professional.
  2. Enhances Durability: Piping strengthens the cushion’s seams, ensuring that it holds up better over time, even in high-traffic areas.
  3. Increases Aesthetic Appeal: The contrast between the piping and flange fabric adds visual interest, while the flanged edge softens the overall look, giving your cushion a more luxurious, high-end feel.
  4. Customizable: By choosing different fabrics for the piping and flange, you can create a unique look that matches your interior style perfectly.

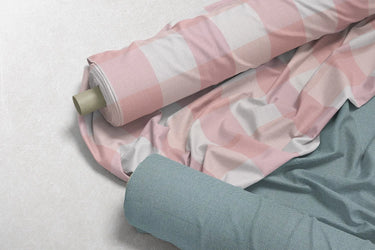
The Cotton Chiese Fabric is the perfect choice for cushions to liven up your interiors!

Conclusion

Making a flanged piping edge for a cushion is a simple yet effective way to elevate your DIY projects. Whether you're refreshing your living room, creating decorative cushions for a bedroom, or adding a chic touch to your window treatments, a flanged piping edge gives your cushions that extra flair. Plus, it’s a fantastic technique to learn, as it opens a world of possibilities for custom-made, professional-looking cushions that complement any interior design style.

At The Millshop Online, we offer a wide selection of premium fabrics to help bring your cushion creations to life. Browse our collection today and start adding that perfect piping detail to your next project!

Take a look at our fabrics to get started on your cushion project!