

Eyelet curtains add a modern, minimalist and sleek touch to any room. Using eyelet heading tape allows you to create beautifully finished curtains with a simple, elegant look. If you’ve never worked with eyelet heading tape before, don't worry—it’s easier than it may seem. Here’s a step-by-step guide on how to use eyelet heading tape to create stunning eyelet curtains for your home.
Measuring for Eyelet Curtains: A Step-by-Step Guide
When measuring for eyelet curtains, it's important to take a few key steps to ensure a perfect fit and beautiful finish. Start by calculating the amount of gather for your eyelet curtains using double fullness. This means you’ll need to make the curtain width twice the width of the window to achieve the luxurious, full look that eyelet curtains are known for.
Unlike most other heading tapes where the tape is cut to fit the final curtain width, with eyelet tape, you need to adjust the curtain width to fit the tape. Eyelet tape requires an even number of rings, ie. 4, 6, 8, 10 etc, so ensure that your final curtain width matches these increments.
When you are taking the measurement for the finished drop to calculate how much fabric you require ensure you add the stand up over the eyelet ring, when using our eyelet tape this is 2cm.
As you attach the tape, remember that the plastic tags should face outward at both ends of the curtain. These tags will be used to form pleats when the rings are added, giving the curtain a crisp, tailored appearance. If needed, join multiple widths of fabric together to meet the required curtain width, and then adjust as necessary to fit the eyelet tape.
Step 1: Make Up Your Curtain as Normal
Begin by making up your curtain as you normally would. This includes attaching the lining to the main fabric and turning your top hem down by the depth of the eyelet heading tape. Typically, you would turn the top hem down by 3 inches to accommodate the tape. This is the foundation for the eyelet tape to sit on, ensuring that your curtain is the right length and has a clean, professional appearance.
Step 2: Attach the Eyelet Heading Tape

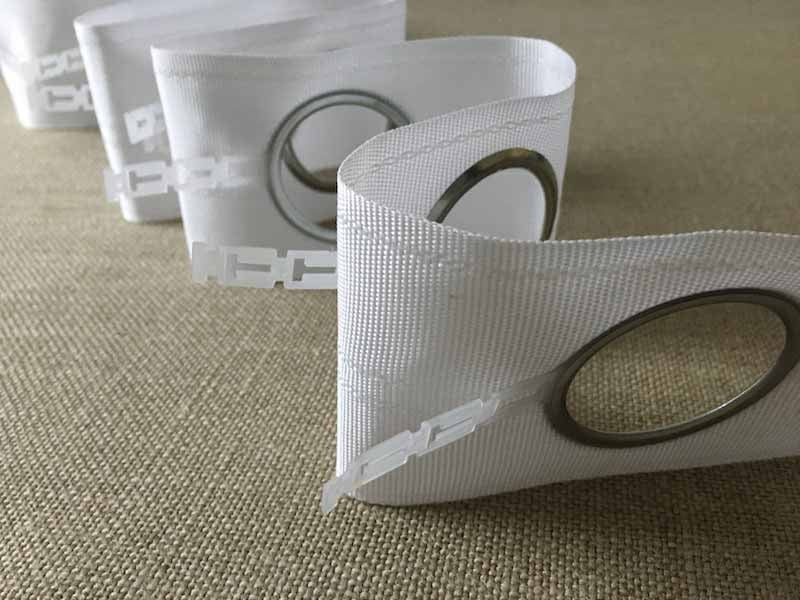
Once your curtain fabric is ready, it’s time to attach the eyelet heading tape. Position the tape at the top of the curtain (on the back side), aligning it with the top edge. The tape is designed to be sewn in just like a regular heading tape, so use a sewing machine to stitch it securely along the top edge of your fabric. Make sure that the plastic tabs on the tape are facing outwards, as shown in the image.

Step 3: Cut Through the Fabric and Lining
After attaching the heading tape, you’ll need to cut through the fabric and the lining at each hole of the eyelet tape. This is where precision matters—using a scalpel blade or a very sharp pair of scissors, carefully cut through the fabric and lining at each of the marked holes. Make sure to cut neatly and cleanly to ensure a smooth, professional finish. A sharp blade will make this task easier and more accurate.

Step 4: Add the Eyelet Rings
Once your fabric is cut, it’s time to insert the eyelet rings. Turn the curtain to the front and click a ring into each of the holes on the eyelet heading tape. This system only requires one ring on the front of the curtain, which makes the installation process quick and straightforward. Simply click each metal ring into place. The thickness of the fabric and lining, along with the metal ring on the tape, will hold everything securely in place, ensuring that your curtains hang perfectly.
Step 5: Create the Waves in Your Eyelet Tape
To achieve the signature wave effect in your eyelet curtains, start by linking the plastic tabs on the back of your curtain. These tabs help create a consistent, even wave pattern along the top, giving your curtains a beautifully tailored look. While it’s not necessary to use the plastic tabs, they’re highly recommended for achieving a more uniform and professional appearance. Once the tabs are linked and the waves are formed, simply thread your eyelets over the curtain pole. This final step will leave you with a stunning, polished eyelet curtain that’s both elegant and effortless.
Conclusion
Using eyelet heading tape is an excellent way to create professional-looking eyelet curtains with ease. The steps are simple, and with a bit of care, you can achieve beautiful results. By following these instructions, you’ll not only enhance the aesthetic of your space but also gain a sense of accomplishment from making your own stunning curtains.
If you're ready to get started, browse through our fabric selection and choose the perfect material for your eyelet curtains today. Whether you’re working with a bold pattern, a luxurious velvet, or a crisp linen, we’ve got the perfect fabric to bring your vision to life. Happy sewing!


